Learn how to add colour, borders and alignment settings to your Excel data to give your worksheet a more professional look and to make it easier for others to read.
Applying formatting
Some of the more common formatting commands can be applied using commands on the Home tab.
When formatting a cell first select the cell or range of cells to be formatted and then click the formatting tool – for example to format a cell so that the contents are bold select the cell and then from the Font group click the Bold button.
| Formatting Tool | Description |
| Font and Font Size. Click the drop-down arrows to select a font style or font size. To quickly adjust the font size click the Increase Font Size and Decrease Font Size buttons. | |
| Bold, Italics and Underline. Click to turn on and off. A dark box around the button indicates it is turned on. | |
| Click the Align Left, Centre or Align Right alignment buttons to send the text in the selected cell to the left, middle or right of the column. Use the Indent buttons to indent the text. Use the Merge and Centre options to merge several cells into one. Select Unmerge to unmerge the cells. | |
| Click the Top Align, Middle Align or Bottom Align buttons to vertically align your cell content. Use Orientation to change the direction of the content and and Wrap text to wrap the text within the cell. Tip: You can also press ALT + ENTER to type data on several lines within a cell. | |
| Select an appropriate border option from the Borders drop-down list. To remove borders select No Border. Select an appropriate background or font colour from the Fill Color or Font Color options. To remove a fill colour select No Fill. Note: please don’t select ‘white’ to remove Fill colour. White is actually a colour and therefore will colour the background of the cell white. This can lead to your cells looking like they no longer have bordres around them! To remove a font colour select Automatic from the top of the options list. | |
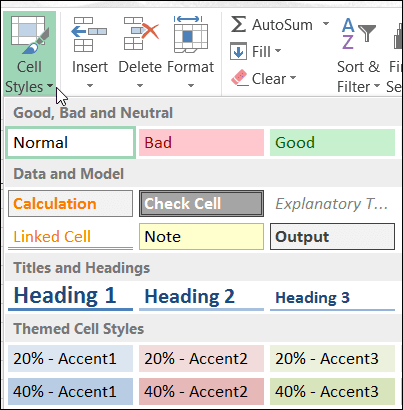
 | Quickly format a range by selecting from pre-defined styles in the Cell Styles gallery. Once Styles have been applied use the Themes feature on the Page Layout tab to automatically apply a new look to the worksheet. |
Removing formatting from a cell
Once formatting has been applied to a cell it will remain, even after you have deleted the contents of the cell.
This can sometimes cause complications – for example, if you had previously used the cell to display a percentage format all numbers entered into the cell will be displayed as a percentage.
To remove formatting from a cell do one of the following.
- Apply another format to the cell. The new format will over-ride the old, for example applying a “General” style will over-ride a Percentage style.
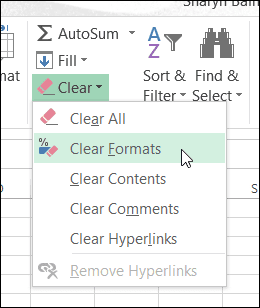
- On the Home tab in the Editing group click Clear. Select Clear Formats.
Was this blog helpful? Let us know in the Comments below.
If you enjoyed this post check out the related posts below.


