Sort an Excel list into numerical, date or alphabetical order to organise your data into a more useful arrangement.
Once you know how to use the Sort command you can organise information so that it's easier to interpret. For example, if you receive a list of purchases made by many different clients on different days of the month it may be easier to see which clients are buying from you at different times of the month. By sorting the data by client and by date you can easily analyse who is buying and when.
Where you have identical information in more than one field you can specify a secondary field to sort by. This is called 'adding another level of sort'.
For example, a personnel list may contain a number of people with the same first and last name. However they may differ in age.
First Name | Surname | Age |
| John | Adams | 33 |
Peter | Smith | 23 |
Sarah | Adams | 43 |
John | Adams | 56 |
Therefore, you can specify the primary sort be performed by Surname, the secondary sort by First Name and then finally by Age.
First Name | Surname | Age |
| John | Adams | 33 |
John | Adams | 56 |
Sarah | Adams | 43 |
Peter | Smith | 23 |
Tip: before you sort your data you might like to put a coloured fill on one or more rows. Once you have performed the sort check that all of the cells within each row are still together and then remove the fill. If the coloured cells aren’t together you have performed the sort incorrectly.
In the examples below, the first image shows where the data has sorted correctly. All cells are still together. The second image shows where the data hasn't sorted correctly. Only column C sorted. If this happens click Undo and start again.

List sorted correctly
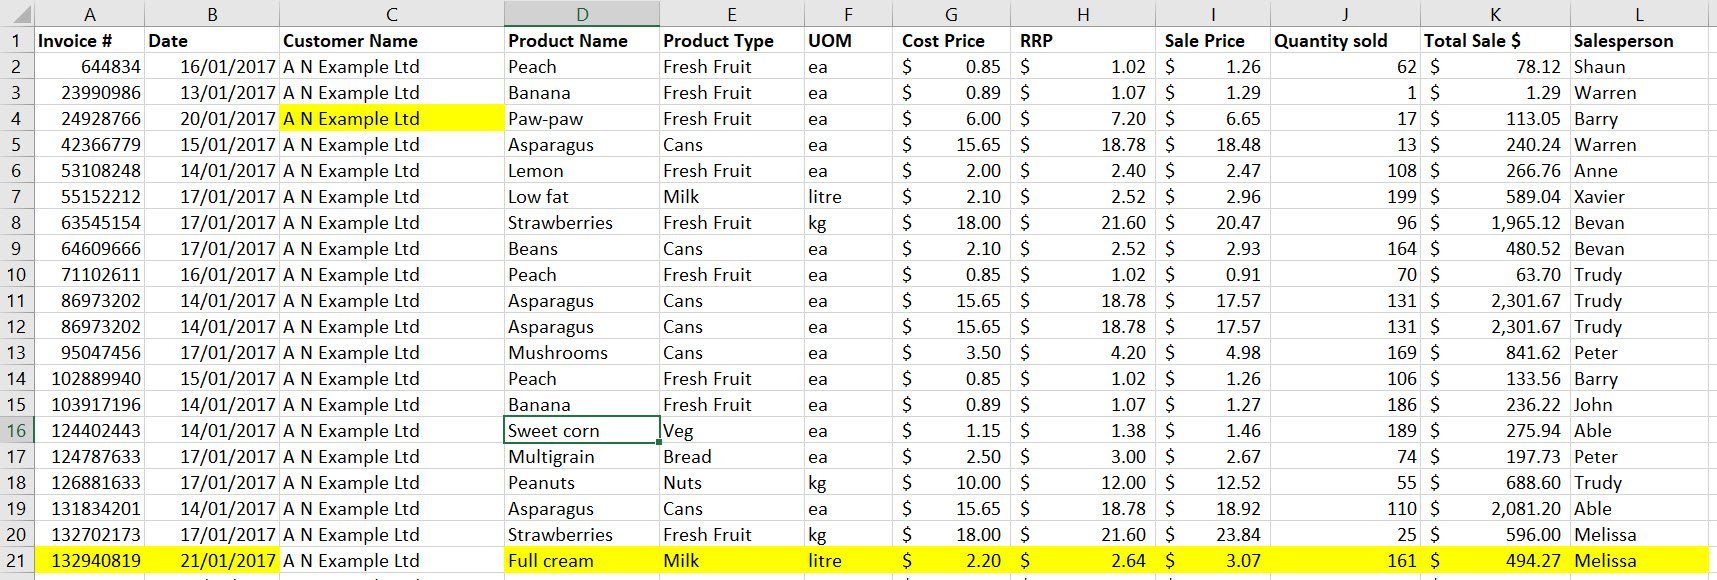
List sorted incorrectly. Only the data in column C has been sorted.
Using the Sort buttons
1. Select a cell in the column you wish to sort on.
Note: if you select the table of data prior to clicking one of the sort buttons, the data will sort based on the column the cell selector is currently sitting in.
2. On the Data tab in the Sort & Filter group click the Sort A to Z or Sort Z to A tool. BTW, these buttons can also be found on the Home tab, in the Editing group on the Sort & Filter button.
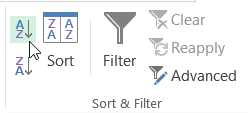
Tip: to sort from A to Z or from the smallest number to the largest, click Sort A to Z. To sort from Z to A or from the largest number to the smallest click Sort Z to A.
WARNING: be careful when selecting just a single column and then clicking a sort button as this will only sort the selected data. If you accidently do this a dialog box will be displayed.
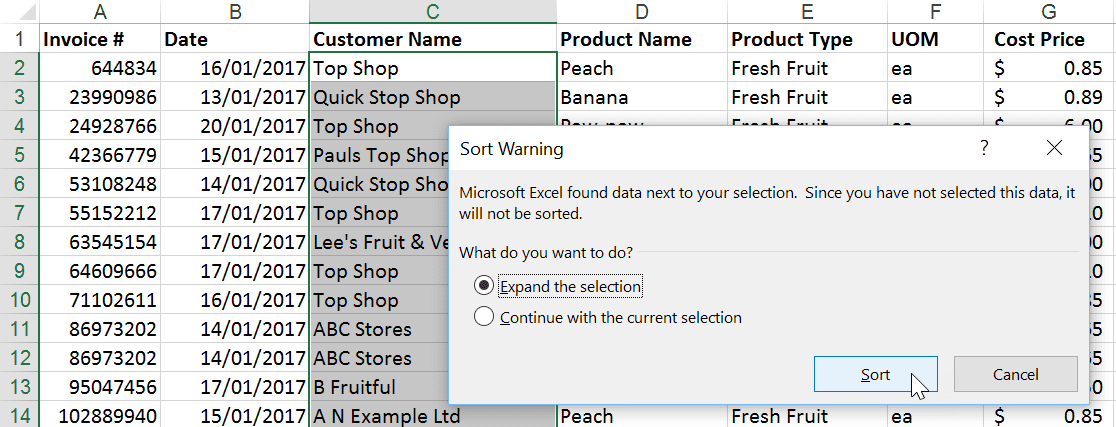
Be sure to select Expand the selection to include ALL of the row data within the sort. If you make a mistake and click Continue with the current selection you might like to click Undo or close your file without saving.
Using the Data Sort command
Using this command, you can set up second and third levels of sorting as well as specify whether you wish to sort by rows or columns.
1. Select the range you want to sort including the column headings.
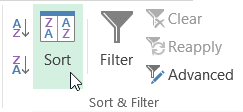
2. On the Data tab in the Sort & Filter group click Sort. The Sort dialog box will appear.
3. If the first row of your database is headings, select the My data has headers option. This will ensure the headings are not included in the sort range.
4. From the Sort by drop down list box select the field name that the sort is to be governed by. Select what the data will be sorted on - values, cell or font colour or cell icon. Specify the sort order. If you would like to perform another level of sorting (a sort within a sort) click the Add Level button.
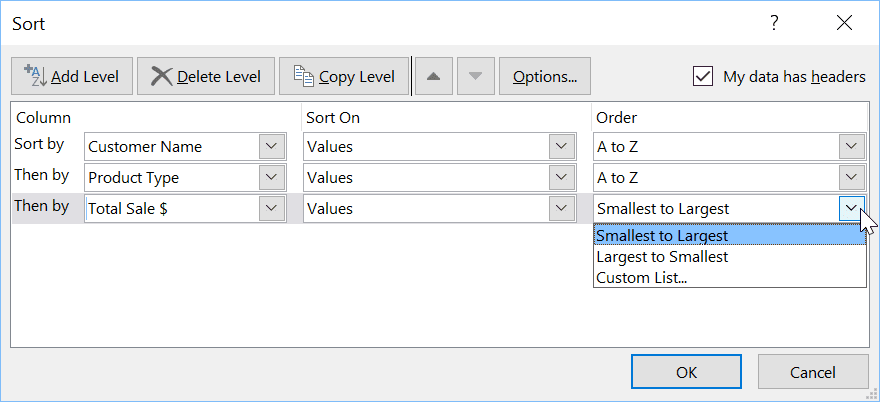
In the example above, three levels of sort have been defined.
This means that the data will first be sorted so that all customer names are alphabetically grouped first.
The second level of sort means that all of the Product Types, within each Customer Name group will be sorted alphabetically.
The third level will sort Total Sales $ values so that for each Product Type group the largest sale is shown at the top of the list and the smallest at the bottom.
You can see in the image below step 5 the result. 'A N Example' has been displayed with all Product Types being sorted within the group, e.g. Cans, Fresh Fruit. The largest sale for each Product Type is shown in the Total Sale $ column.
5. Finally, click OK to perform the sort.

Note: use the Move Up and Move Down buttons on the Sort dialog box to change the importance of a sort level. Click Delete Level to remove a level or Copy Level to copy an existing level as a new level.
Was this blog helpful? Let us know in the Comments below.
If you enjoyed this post check out the related posts below.

